

EmDash 入門
このガイドでは、インストールから最初の投稿を公開するまで、初めてのEmDashサイトを作成する手順を説明します。
EmDashが適切なAstro CMSかどうかまだ検討中の場合は、まずEmDashとは?または最適なAstro CMSをお読みいただき、その後このセットアップガイドに戻ってください。
- Node.js v22.12.0 以上(奇数バージョンはサポートされていません)
- npm、pnpm、または yarn
- コードエディタ(VS Code推奨)
新規プロジェクトの作成
Section titled “新規プロジェクトの作成”npm create emdash@latestbashpnpm create emdash@latestbashyarn create emdashプロンプトに従ってプロジェクト名を付け、設定を行ってください。
開発サーバーの起動
Section titled “開発サーバーの起動”-
プロジェクトディレクトリに移動します:
Terminal window cd my-emdash-site -
依存関係をインストールします:
Terminal window npm install -
開発サーバーを起動します:
Terminal window npm run dev -
ブラウザで `http://localhost:4321“ を開きます
セットアップウィザードの完了
Section titled “セットアップウィザードの完了”管理パネルに初めてアクセスすると、EmDashのセットアップウィザードが初期設定を案内します:
-
セットアップウィザードにリダイレクトされます。以下を入力してください:
- サイトタイトル — サイトの名前
- タグライン — 短い説明
- 管理者メールアドレス — あなたのメールアドレス
-
サイト作成をクリックしてパスキーを登録します
-
ブラウザがTouch ID、Face ID、Windows Hello、またはセキュリティキーを使用したパスキーの作成を促します
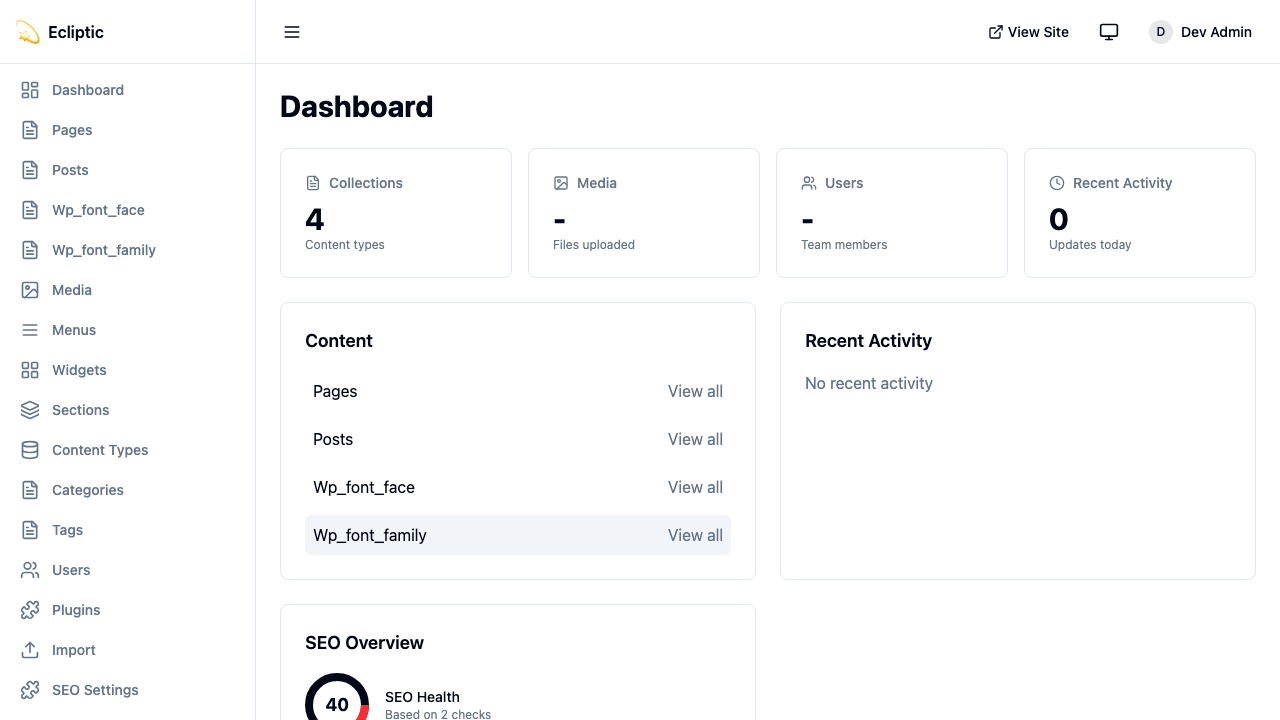
パスキーが登録されると、ログイン状態になり管理ダッシュボードにリダイレクトされます。
-
管理サイドバーで、コンテンツの下の投稿をクリックします。
-
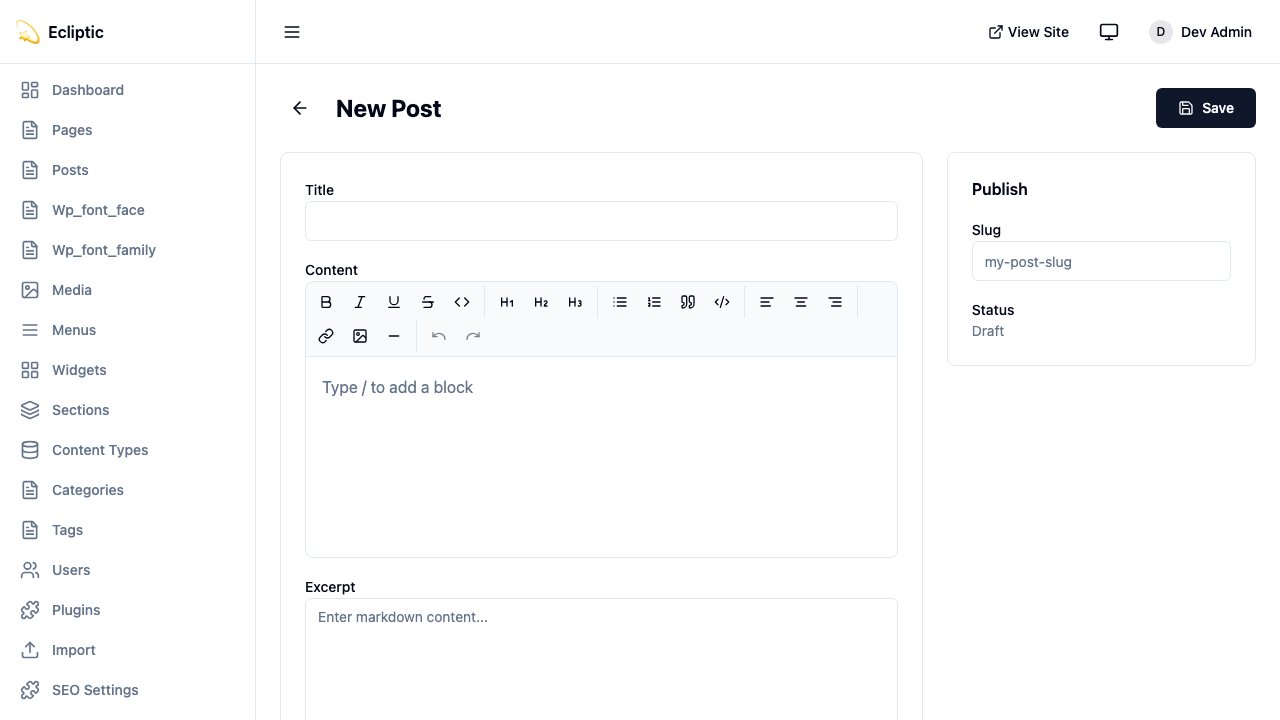
新規投稿をクリックします。
-
タイトルを入力し、リッチテキストエディターを使用してコンテンツを記述します。
-
ステータスを公開に設定し、保存をクリックします。
-
サイトのホームページにアクセスして、投稿がライブで表示されていることを確認します—再ビルドは不要です!
プロジェクト構造
Section titled “プロジェクト構造”EmDashプロジェクトは、いくつかの追加要素を含む標準的なAstro構造に従います:
my-emdash-site/├── astro.config.mjs # Astro + EmDash configuration├── src/│ ├── live.config.ts # Live Collections configuration│ ├── pages/│ │ ├── index.astro # Homepage│ │ └── posts/│ │ └── [...slug].astro # Dynamic post pages│ ├── layouts/│ │ └── Base.astro # Base layout│ └── components/ # Your Astro components├── .emdash/│ ├── seed.json # Template seed file│ └── types.ts # Generated TypeScript types└── package.json設定ファイル
Section titled “設定ファイル”astro.config.mjs
Section titled “astro.config.mjs”ここでEmDashをAstro統合として設定します:
js title="astro.config.mjs"import { defineConfig } from "astro/config";import emdash, { local } from "emdash/astro";import { sqlite } from "emdash/db";
export default defineConfig({  integrations: [    emdash({      database: sqlite({ url: "file:./data.db" }),      storage: local({        directory: "./uploads",        baseUrl: "/_emdash/api/media/file",      }),    }),  ],});
src/live.config.ts
Section titled “src/live.config.ts”ここでEmDashをAstroのコンテンツシステムに接続します:
ts title="src/live.config.ts"import { defineLiveCollection } from "astro:content";import { emdashLoader } from "emdash/runtime";
export const collections = { _emdash: defineLiveCollection({ loader: emdashLoader() }),};本番環境へのデプロイには、以下を設定する必要があります:
# Required for authenticationEMDASH_AUTH_SECRET=your-secret-here
# オプション: コンテンツプレビュー用EMDASH_PREVIEW_SECRET=your-preview-secret
安全な認証シークレットを生成するには:
npx emdash auth secretページでのコンテンツクエリ
Section titled “ページでのコンテンツクエリ”AstroページでEmDashのクエリ関数を使用します。これらはAstroのライブコレクションパターンに従い、コレクションには { entries, error } を、単一エントリーには { entry, error } を返します:
astro title="src/pages/index.astro"---import { getEmDashCollection } from "emdash";import Base from "../../layouts/Base.astro";
const { entries: posts } = await getEmDashCollection("posts");---
<Base title="ホーム">  <h1>最新の投稿</h1>  <ul>    {posts.map((post) => (      <li>        <a href={`/posts/${post.slug}`}>{post.data.title}</a>      </li>    ))}  </ul></Base>
単一エントリーの場合:
astro title="src/pages/posts/[slug].astro"---import { getEmDashEntry } from "emdash";
const { slug } = Astro.params;const { entry: post } = await getEmDashEntry("posts", slug);
if (!post) {  return Astro.redirect("/404");}---
<h1>{post.data.title}</h1>
TypeScript型の生成
Section titled “TypeScript型の生成”完全な型安全性のために、データベーススキーマから型を生成します:
npx emdash typesこれにより、すべてのコレクションのインターフェースを含む .emdash/types.ts が作成されます。エディタがフィールド名を自動補完し、型エラーを検出するようになります。
次のステップ
Section titled “次のステップ”これで動作するEmDashサイトができました!次に進むべき場所は以下の通りです:
- コアコンセプト — EmDashの内部動作を理解する
- コンテンツの操作 — コンテンツのクエリとレンダリングを学ぶ
- メディアライブラリ — 画像やファイルのアップロードと管理
- ブログの作成 — カテゴリとタグを含む完全なブログを構築する
- Cloudflareへのデプロイ — サイトを本番環境に移行する